Tools / 2020.03.14
kubeadm concept and practice
1. kubeadm knowledge map
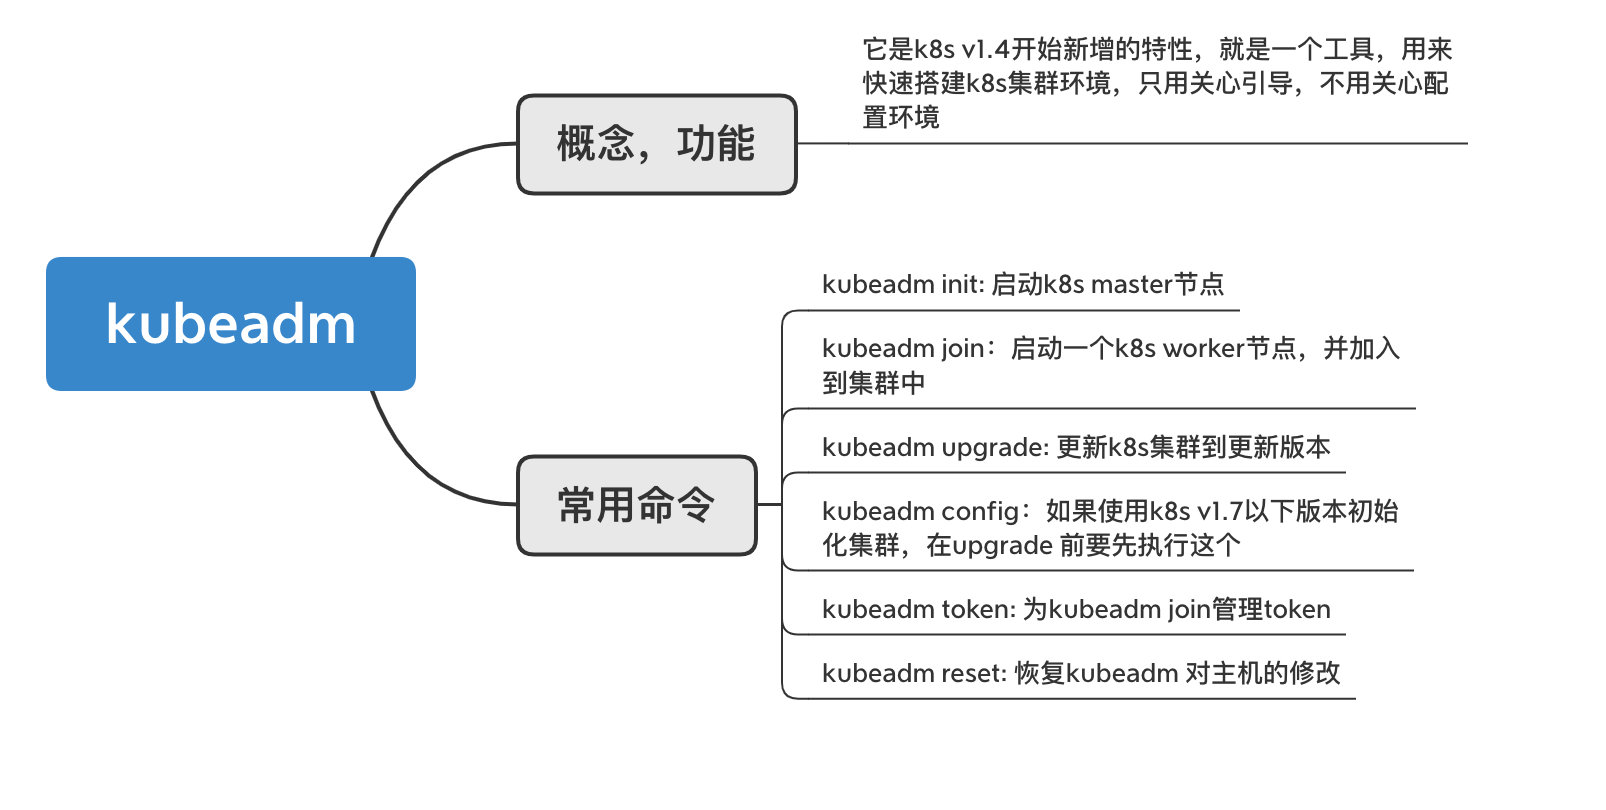
Kubeadm is a tool to implement the k8s environment quickly. Also you don't need to care about the configure environment, just know how to bootstrap it. Master the basically command to use kubeadm.
2. Kubeadm practice
2.1 The practice environment
Google cloud instance Linux system.
2.2 Environment configure
- Install container (Docker)
> `` > # 安装 Docker CE > ## 设置仓库 > ### 安装软件包以允许 apt 通过 HTTPS 使用存储库 > apt-get update && apt-get install \ > apt-transport-https ca-certificates curl software-properties-common > > ### 新增 Docker 的 官方 GPG 秘钥 > curl -fsSL https://download.docker.com/linux/ubuntu/gpg | apt-key add - > > ### 添加 Docker apt 仓库 > add-apt-repository \ > "deb [arch=amd64] https://download.docker.com/linux/ubuntu \ > $(lsb_release -cs) \ > stable" > > ## 安装 Docker CE > apt-get update && apt-get install docker-ce=18.06.2~ce~3-0~ubuntu > > # 设置 daemon > cat > /etc/docker/daemon.json <<EOF > { > "exec-opts": ["native.cgroupdriver=systemd"], > "log-driver": "json-file", > "log-opts": { > "max-size": "100m" > }, > "storage-driver": "overlay2" > } >EOF > mkdir -p /etc/systemd/system/docker.service.d > > # 重启 docker. > systemctl daemon-reload > systemctl restart docker > ``
- Install kubeadm, kubectl and kubelet
>`` >apt-get update && apt-get install -y apt-transport-https curl >curl -s https://packages.cloud.google.com/apt/doc/apt-key.gpg | apt-key add - > >cat <<EOF > >/etc/apt/sources.list.d/kubernetes.list >deb https://apt.kubernetes.io/ kubernetes-xenial main >EOF > >apt-get update > >apt-get install -y kubelet kubeadm kubectl >apt-mark hold kubelet kubeadm kubectl >``
2.3 kubeadm practice
Background: Use kubeadm to create the k8s master node, then loop other nodes to this master node.
- Initialize the master node.
> ``bash > kubeadm init --pod-network-cidr=10.244.0.0/16 --ignore-preflight-errors=all > ``
pod-network-cidr, means identify the pod ip range, also we use the flannel network design solution. Ignore, means ignore the error when startup. Because when start up kubeadm, perhaps hit the hardware uncomfortable.
- After start up successful, will generate the kubeadm token, this token can be used to join other nodes. You can use below command to view the token.
> ``bash > kubeadm token list > ``
- Configure the kubectl.
As we know, kubectl is the command tool to control kubernetes cluster. When we switch to the master node, we need to configure the kubectl. > ``bash > mkdir -p $HOME/.kube > cp -i /etc/kubernetes/admin.conf $HOME/.kube/config > chown $(id -u):$(id -g) $HOME/.kube/config > echo export KUBECONFIG=~/.kube/config>> ~/.bashrc > source ~/.bashrc > ``
- Install the pod network add-on. The pods can communicate each other after install the pod network. Also we use the flannel network mode.
> `` bash > kubectl apply -f https://raw.githubusercontent.com/coreos/flannel/2140ac876ef134e0ed5af15c65e414cf26827915/Documentation/kube-flannel.yml > ``
- Join other nodes to the cluster.
> `` bash > sudo kubeadm join 10.128.0.2:6443 --token 5dhzcw.h7aih16mg982ms2o --discovery-token-ca-cert-hash sha256:e9e6843a6ae6fc5fb8acb9f116bc58d1c1e0f30d1da9bfe3bf151319c3788d57 --ignore-preflight-errors=all > ``
- Clean up the environment.
After deploy, you can clean up the environment. > ``bash > sudo kubeadm reset > ``
3. Additional
Actually there are many issues when you follow the steps. Unsolved problems:
- After execute the kubeadm join command, the terminal show it was added successful, but in fact, the new node isn't existing in the node list.
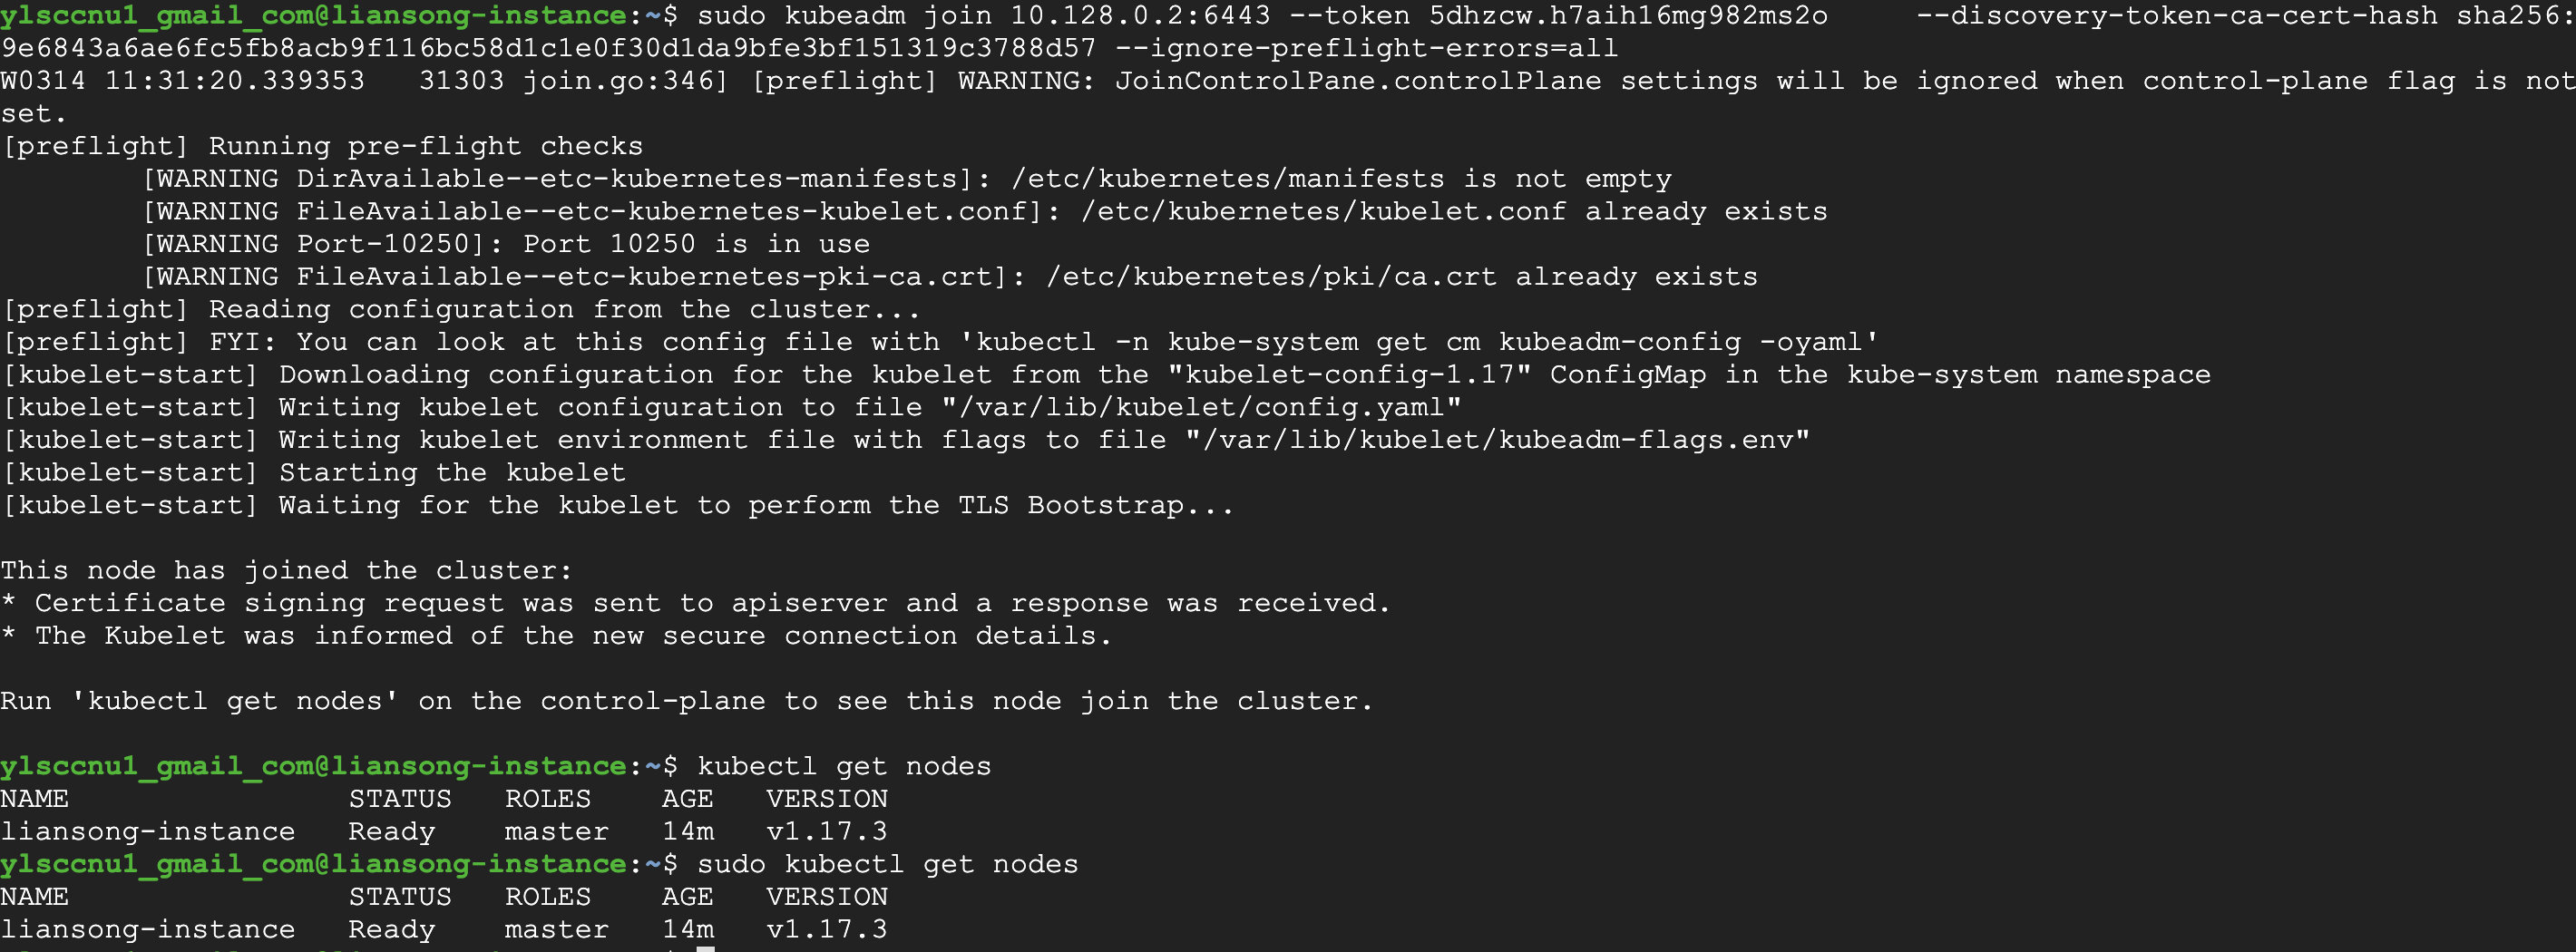
The solution: I misunderstood the concept of kubeadm, So hit this issue. Actually, kubeadm aims to create the implement the k8s environment, so it will create the kubenetes master node when you execute the kubeadm init command. Then you can arrange other nodes to this master node. So my solution is like this.
At first, create a new instance, then in this instance configure the container, kubectl, kubelet and kubeadm tools. After this, execute this command. > `` > kubeadm join --token 5dhzcw.h7aih16mg982ms2o 10.128.0.2:6443 --discovery-token-ca-cert-hash sha256:e9e6843a6ae6fc5fb8acb9f116bc58d1c1e0f30d1da9bfe3bf151319c3788d57 --ignore-preflight-errors=all > ``
Certainly, you must be the root role. The result is below.

- In the node machine, when you execute the command "kubectl version" or "kubectl get nodes", hit this issue.

You can download the master node, "/etc/kubernetes/admin.conf", then copy this file to the node machine path "/etc/kubernetes/". Then follow the previous steps to configure the kubectl.
4. Reference Link
- How to install docker.
https://kubernetes.io/docs/setup/production-environment/container-runtimes/#docker
- How to install kubectl, kubeadm, kubelet.
- Practice Intruction.
https://kubernetes.io/docs/setup/production-environment/tools/kubeadm/create-cluster-kubeadm/