Volume
K8S study notes

1. emptyDir
It’s the basis of Volume. The life cycle depends on the Pod. The volume will be removed when the related Pod was removed. So we can think of it as the path of the Pod. All the containers of the pod share this voiume. Let’s show how to setup the volume configure.
1 2 3 4 5 6 7 8 9 10 11 12 13 14 15 16 17 18 19 20 21 22 23 24 25 26 27 28 29apiVersion: v1 kind: Pod metadata: name: producer-consumer spec: containers: - image: busybox name: producer volumeMounts: - mountPath: /producer_dir name: shared-volume args: - /bin/sh - -c - echo "hello world" > /producer_dir/hello; sleep 30000 - image: busybox name: consumer volumeMounts: - mountPath: /consumer_dir name: shared-volume args: - /bin/sh - -c - cat /consumer_dir/hello; sleep 30000 volumes: - name: shared-volume emptyDir: {}
The above file is about configure the volume practice. We design two containers in the pod, one is to producer, write the log in the path file, another is to consumer, read the log from the file. It’s easy to understand that these two containers share the storage from the pod.
2. HostPath
It’s rare to use this kind of volume. It’s not common. This for Docker host mount the existing path to the Pod. So Pod and containers have very strong coupling. But if pod was removed, the volume is still existing. However, avoid using this kind of volume.
3. Extern Storage Provider
This used extern storage provider to achieve the volume. For example, use the AWS,GCE or Azure and so on. Let me show the configure.
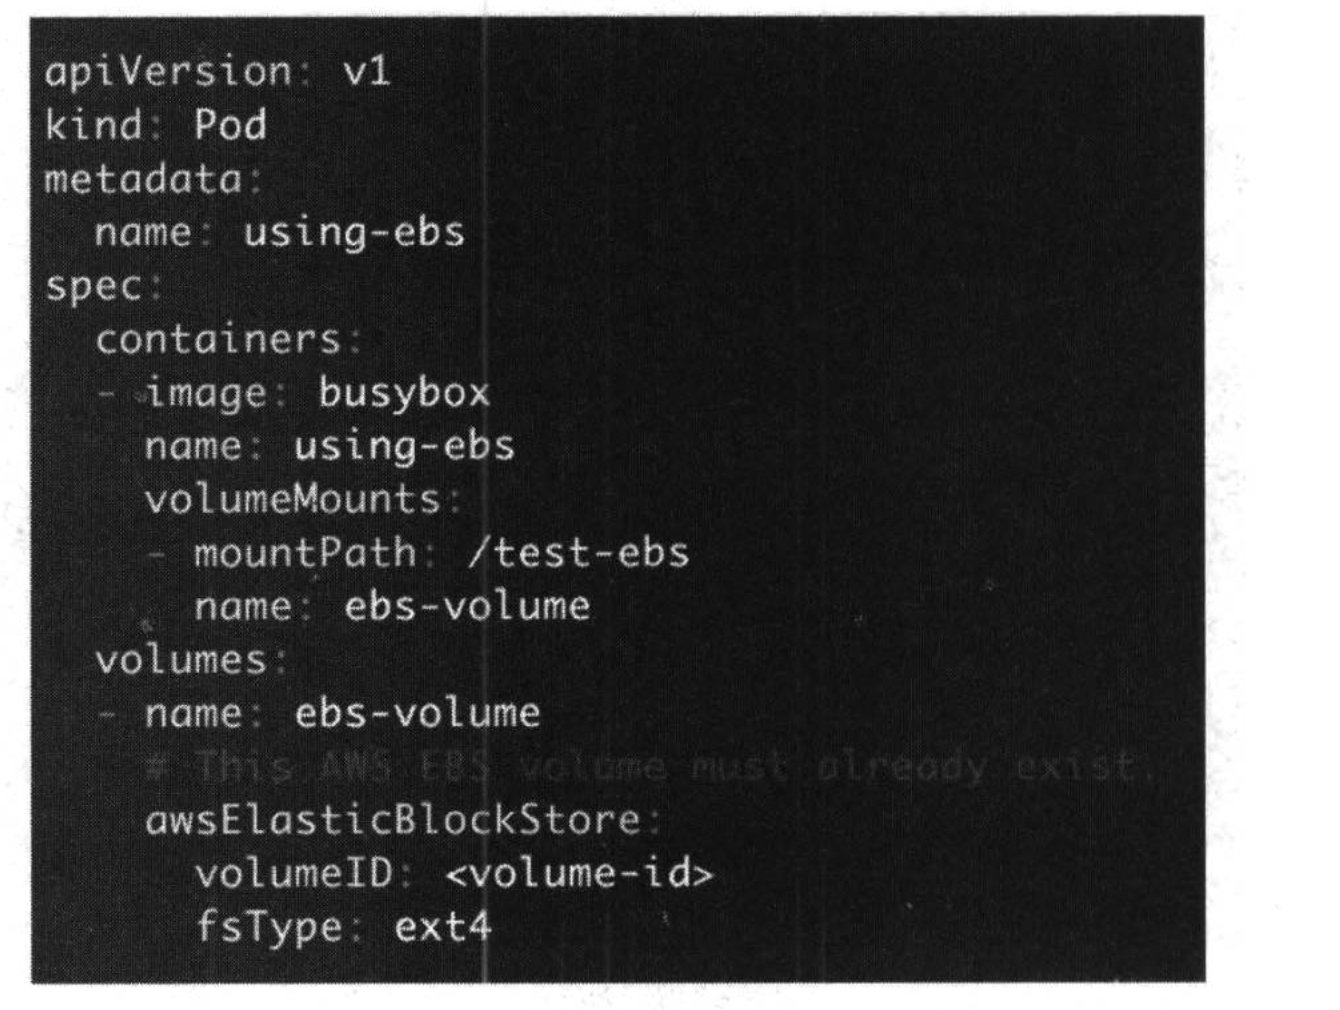
This used the aws storage. The strength about using this is to make the k8s cluster and volume isolated. There is no impact when the k8s cluster destroyed.
4. PersistentVolume & PersistentVolumeClaim
From section 3, we know we can use the extern storage for the k8s volume. But there is one question, actually the storage system always for administration, but the k8s deployment is for developer. There are different departments. How to balance the gap. The solving method is PV and PVC.
PV is maintained by the administration, it’s the extern storage arranged. But PVC is for developer. When deploy the micro service, they can set up the pvc to arrange the space from PV. So PV and PVC coordinate to deploy the whole system.
4.1 NFS PersistentVolume
At first, install the NFS service in the master and slave nodes. Also define the mount path. Below are the PV and PVC configure file.
 1
 2
 3
 4
 5
 6
 7
 8
 9
10
11
12
13
14
15
nfs-pv.yaml apiVersion: v1 kind: PersistentVolume metadata: name: mypv1 spec: capacity: storage: 1Gi accessModes: - ReadWriteOnce persistentVolumeReclaimPolicy: Recycle storageClassName: nfs nfs: path: /tmp/pv1 server: 10.128.0.2
 1
 2
 3
 4
 5
 6
 7
 8
 9
10
11
12
nfs-pvc.yaml apiVersion: v1 kind: PersistentVolumeClaim metadata: name: mypvc1 spec: accessModes: - ReadWriteOnce resources: requests: storage: 1Gi storageClassName: nfs
 1
 2
 3
 4
 5
 6
 7
 8
 9
10
11
12
13
14
15
16
17
18
19
20
pod.yaml apiVersion: v1 kind: Pod metadata: name: mypod1 spec: containers: - name: mypod1 image: busybox args: - /bin/sh - -c - sleep 30000 volumeMounts: - mountPath: "/mydata" name: mydata volumes: - name: mydata persistentVolumeClaim: claimName: mypvc1
In the PV YAML file, we can define the persistent volume policy type. There are 3 types: Retain,Recycle,and Delete.The default policy is Delete.
- Retain: Users deletes a persistentVolumeClaim.the corresponding persistentVolume is not deleted. Instead, it’s moved to the release phase, where all of its data can be manually recovered.
- Recycle: It’s different with Retain, the data can’t be manually recovered when delete the PVC.
- Delete: It’s default mode. Means a dynamically pv is automatically deleted when a user deleted the corresponding pic.
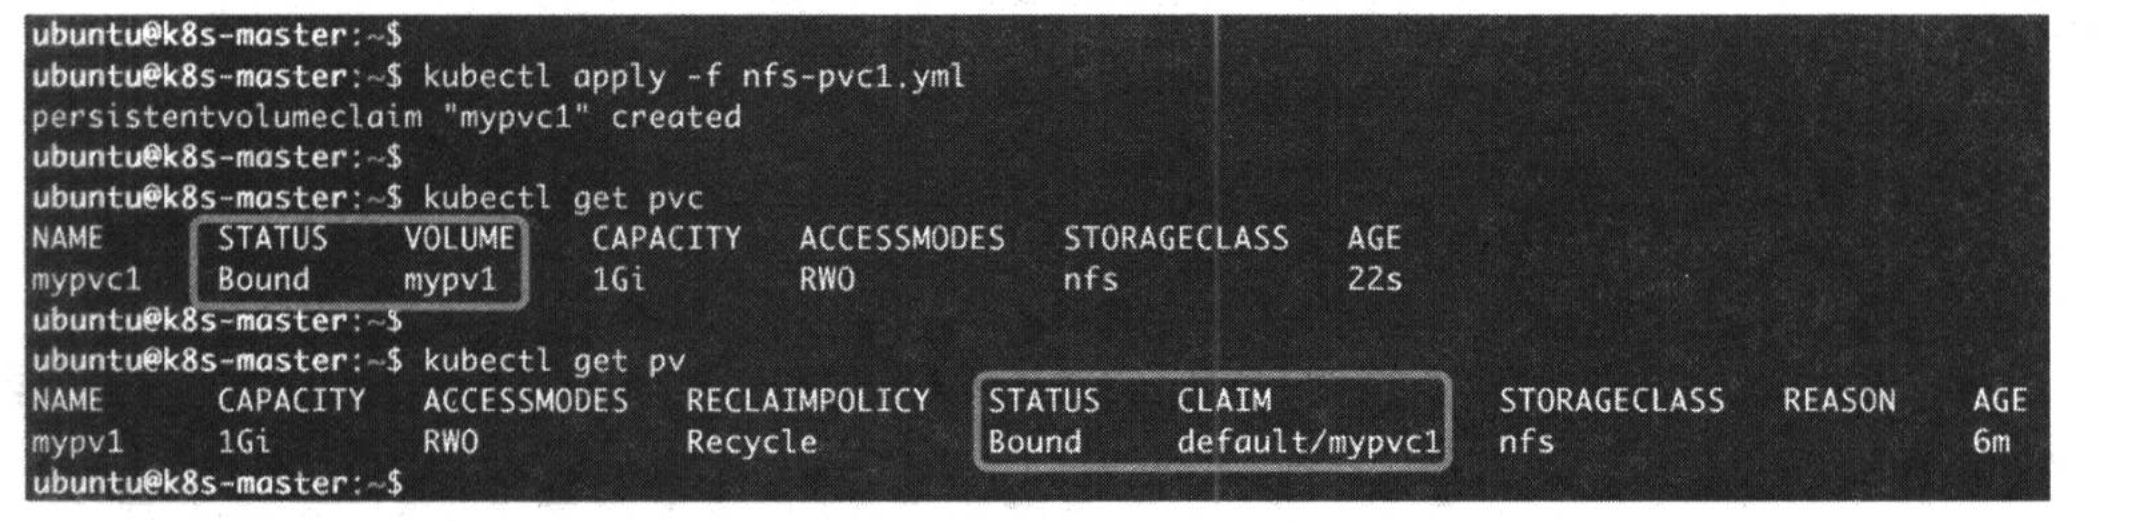
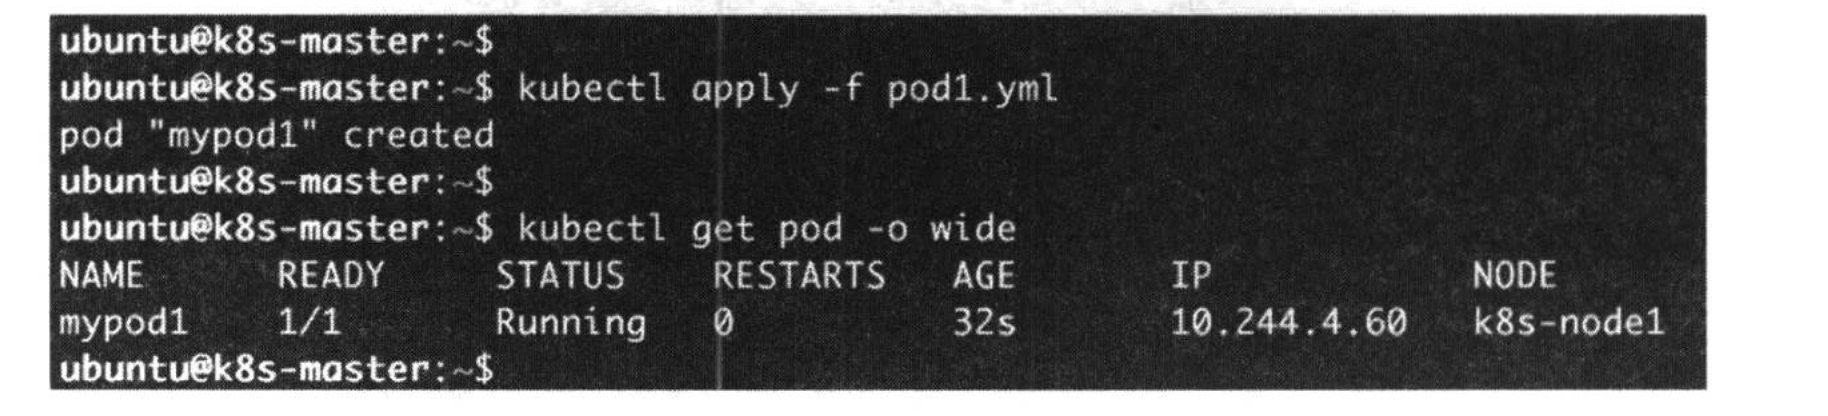
When run the pod, will mount the PVC path. Then use command to write something to the mount path. From the below running result, we can understand the PV and PVC in the NFS.

About is the static provision, there is another kind of provision, it’s the dynamical provision. It arranges the storage according to the situation.
4.2 Database Practice
-
Background: use NFS PV and PVC to database backup when the node shutdown to verify the data persistence.
-
Steps:
-
Deploy the PV and PVC according to the below configure files.
 1
 2
 3
 4
 5
 6
 7
 8
 9
10
11
12
mysql-pvc.yaml apiVersion: v1 kind: PersistentVolumeClaim metadata: name: mysql-pvc spec: accessModes: - ReadWriteOnce resources: requests: storage: 1Gi storageClassName: nfs1 2 3 4 5 6 7 8 9 10 11 12 13 14 15mysql-pv.yaml apiVersion: v1 kind: PersistentVolume metadata: name: mysql-pv spec: accessModes: - ReadWriteOnce capacity: storage: 1Gi persistentVolumeReclaimPolicy: Retain storageClassName: nfs nfs: path: /tmp/mysql-pv server: 10.128.0.2 -
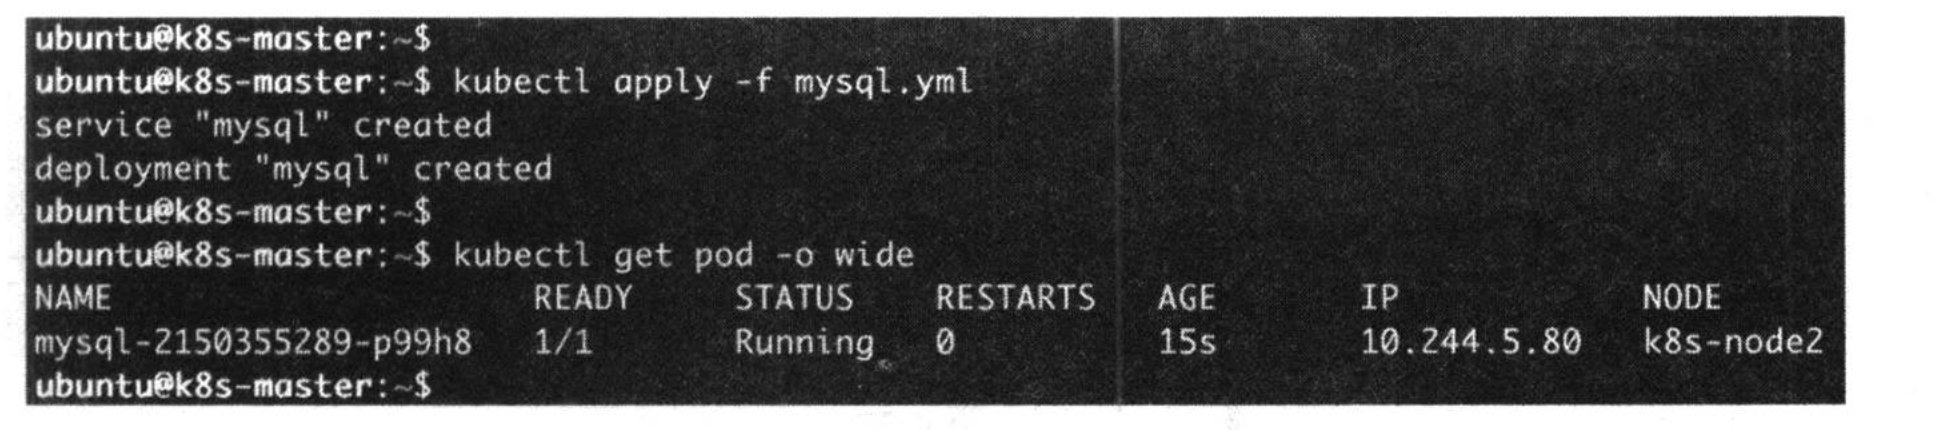
Deploy the mysql pod and service.
1 2 3 4 5 6 7 8 9 10 11 12 13 14 15 16 17 18 19 20 21 22 23 24 25 26 27 28 29 30 31 32 33 34 35 36 37 38 39 40piVersion: v1 kind: Service metadata: name: mysql spec: ports: - port: 3306 selector: app: mysql --- apiVersion: apps/v1 kind: Deployment metadata: name: mysql spec: selector: matchLabels: app: mysql template: metadata: labels: app: mysql spec: containers: - image: mysql:5.6 name: mysql env: - name: MYSQL_ROOT_PASSWORD value: password ports: - containerPort: 3306 name: mysql volumeMounts: - name: mysql-persistent-storage mountPath: /var/lib/mysql volumes: - name: mysql-persistent-storage persistentVolumeClaim: claimName: mysql-pvc -
Use the client to access the database, insert some messages into the database.

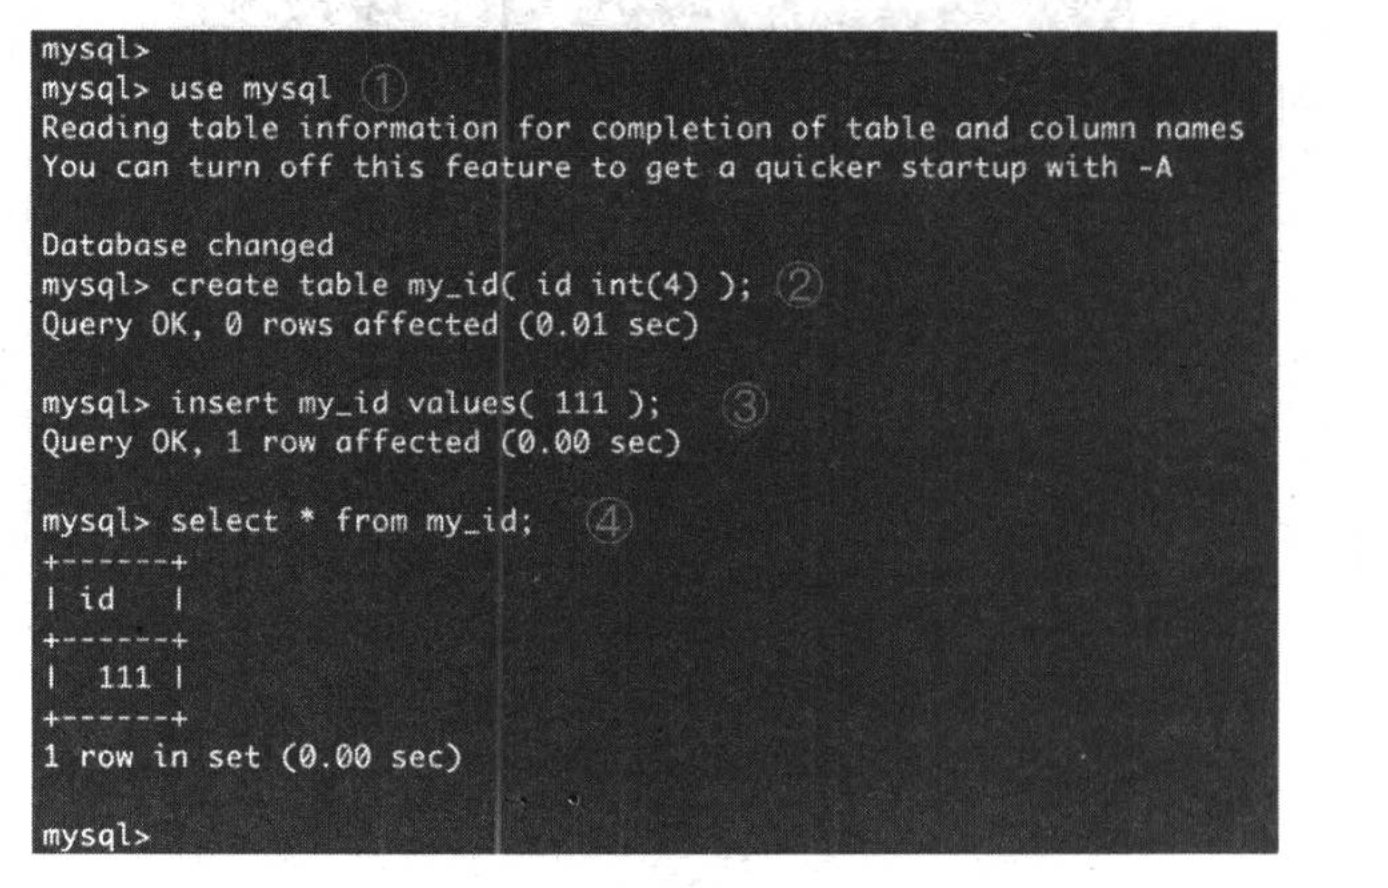
-
Shutdown the node1, then the database will be automatically backup to the node2. After backup, we can verify in the master node.

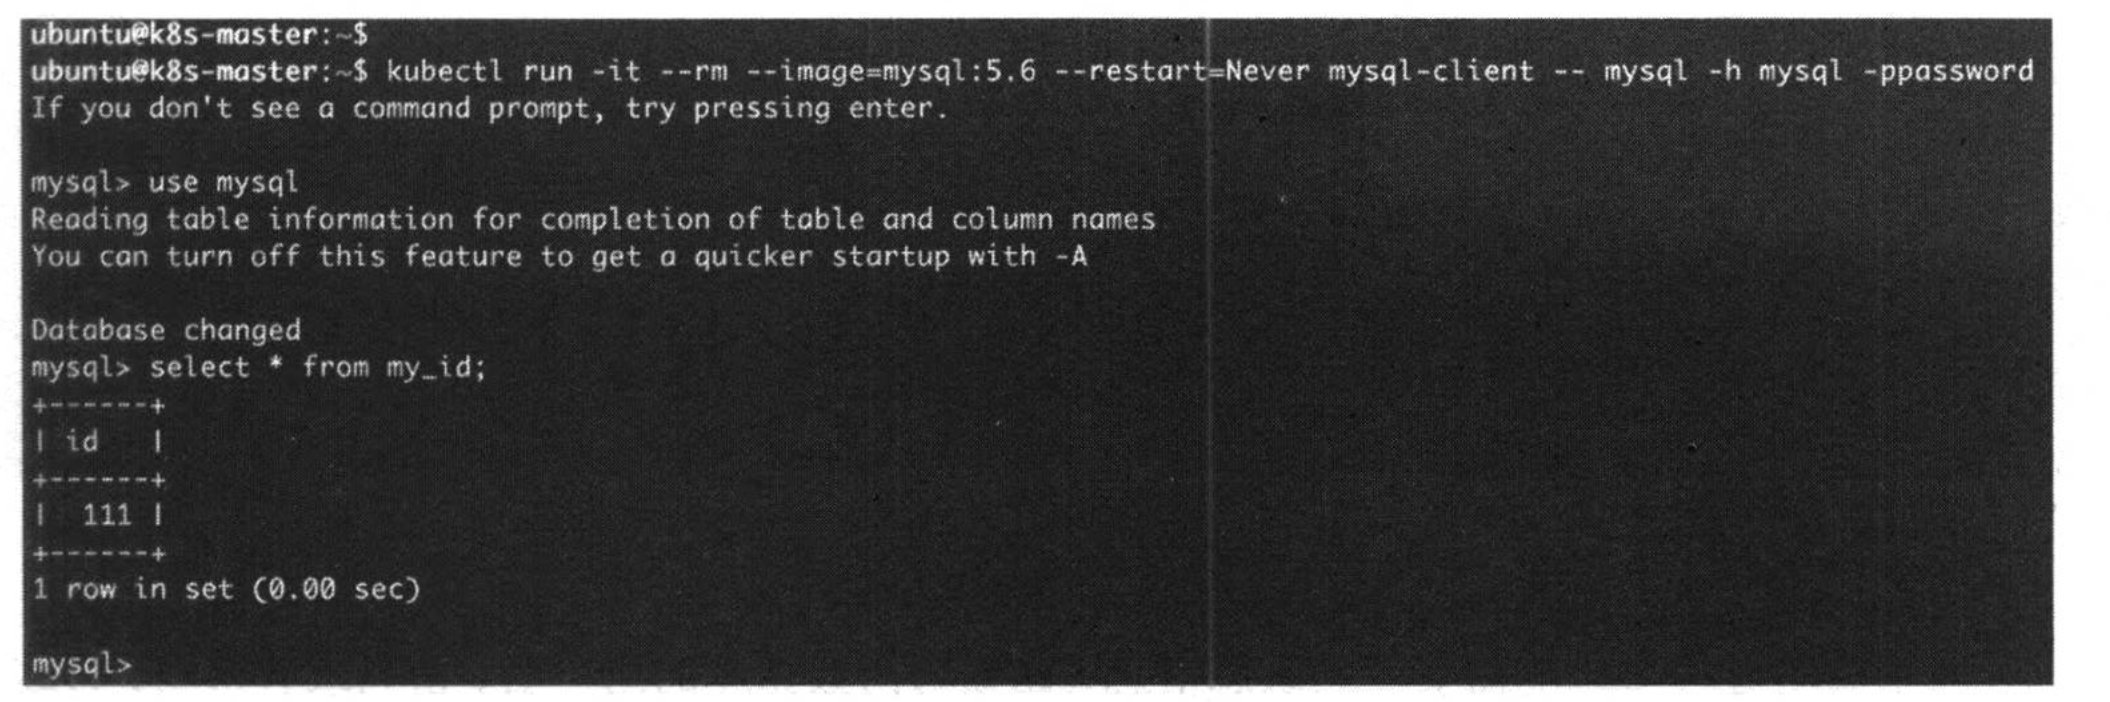
-