Detailed explanation of Docker network
Containers, Microservices

We know that the core of Docker is resource isolation. Docker is equivalent to a process running on the Host, but how do these processes run independently without interfering with each other? This is about Docker’s CGroup and Namespace.
The full name of CGroup is Control Group, which is used to set the limit of CPU, memory and IO resources used by the process. So CGroup is equivalent to resource control. Docker’s CGroup configuration is placed in the configuration file under the path of /sys/fs/cgroup/. Through these configuration files, the resource configuration of the Docker process is set.
Namespace implements Docker resource isolation, corresponding to 6 resources: Mount, UTS, IPC, PID, Network and User.
- Mount Namespace, which allows the container to have its own file system independently
- UTS Namespace, which allows the container to have its own hostname
- IPC Namespace, which allows you to have your own exclusive memory and semaphore to achieve inter-process communication without mixing with host and other container IPC
- PID, process ID
- Network namespace, let the container have its own independent network card, IP, routing and other resources.
- User Namespace, so that the container can manage its own users.
Well, after talking so much nonsense, this chapter will explain the container network.
The container network is actually divided into three types, none, bridge and host. You can view the network configuration of the container through the command mode.

That my_next is a bridge network configured by myself. This is several types of container networks seen on host docker.
1. none network
The none network is a network with nothing. The IO is attached to this network, and there are no other network cards. You can take a look.
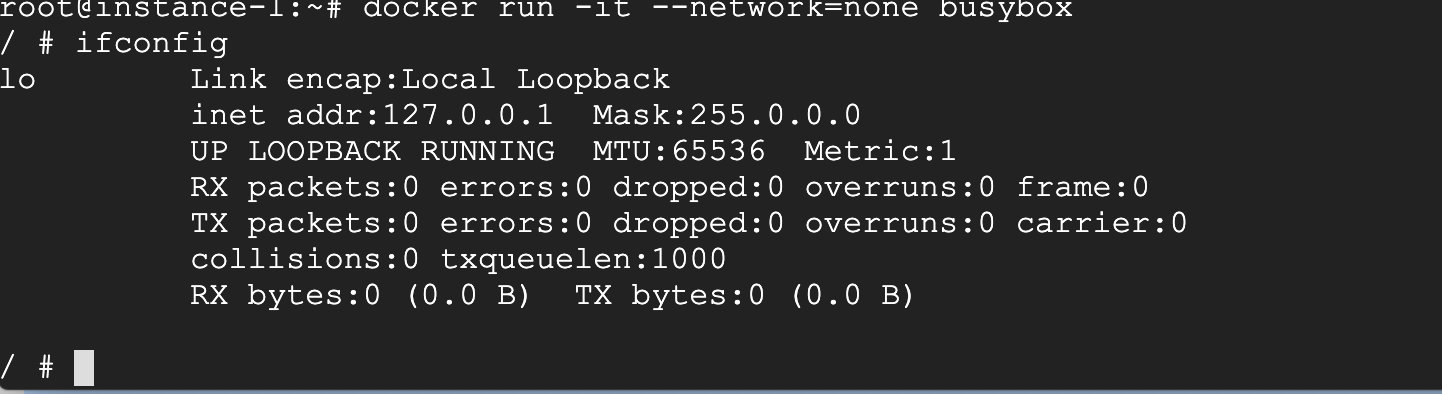
It is configured through –network=none, you can see ifconfig is only a local network.
Some people may ask, what is the function of this kind of network, and it cannot communicate with the outside world. In fact, it still has a role. For example, some privacy involved can be configured in this way, and the key related to the key can be generated through this docker. Some things are still very useful.
2.host network
This kind of network configuration shares its network stack with the Docker host, and the network configuration of the container is exactly the same as that of the host, you can check it out.

You can see that the network mode is configured through –network=host to host mode. It can be seen that its network configuration is exactly the same as that of the host.
What is the usage scenario, that is, if the container has high requirements on network transmission efficiency, you can choose this mode, but the disadvantage is also obvious, that is, it is not very flexible, and port conflicts must be considered.
3. bridge network
This is the most used, and by default it is the created bridge network mode.

As you can see, there are two bridge networks, the first is a bridge I created manually, and the second is a default bridge network of the Docker host. When a docker instance is created with the default network mode, it will be in the default Add an interface under the Docker bridge.
You can create a docker in bridge mode and try it out.
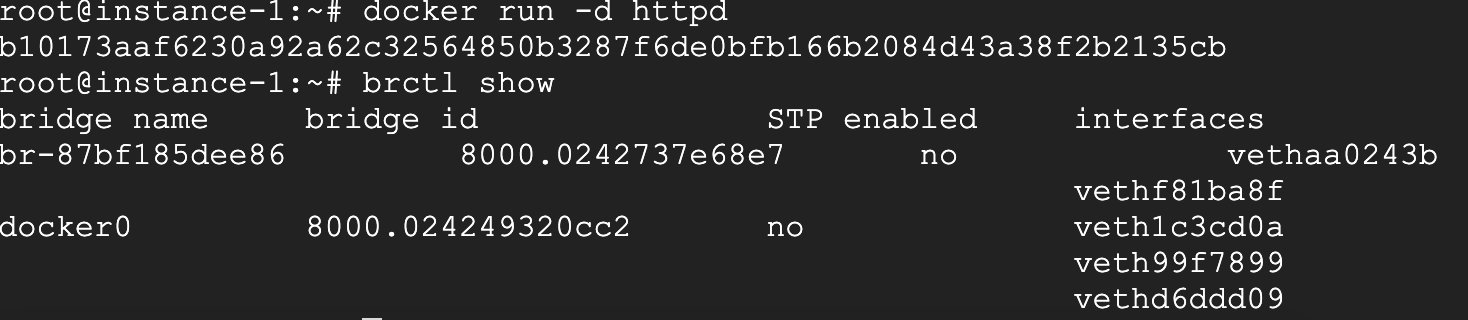
I created a Docker instance, and then added an interface under the bridge of docker0.

You can look at this network configuration, the network name is if48.
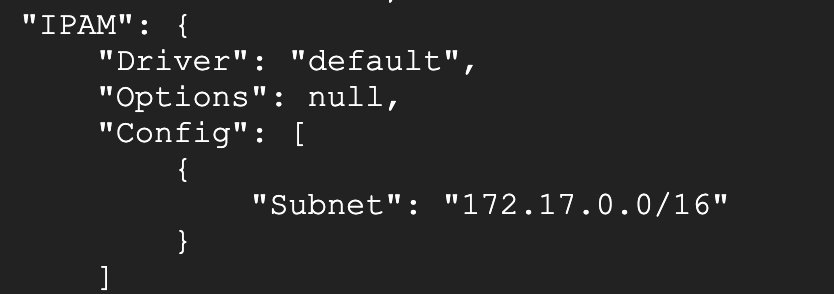
This is the network parameter of the bridge. At the same time, the IP of the Docker Host is 172.17/0.1, and the entire network model is as follows:
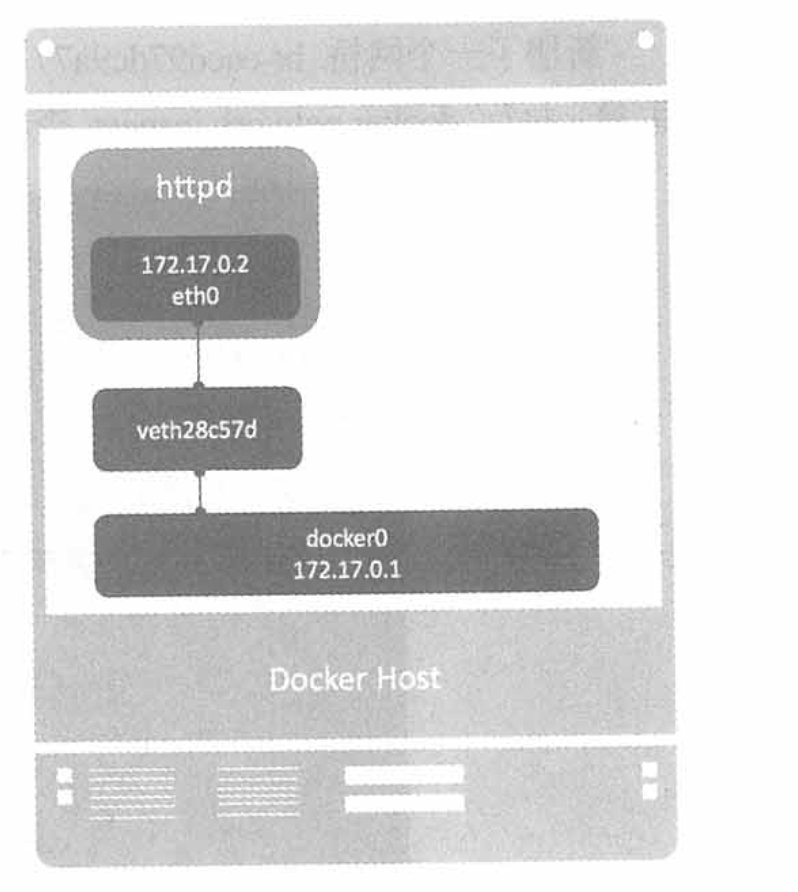
This is a bridge mode.
4. User-defined network
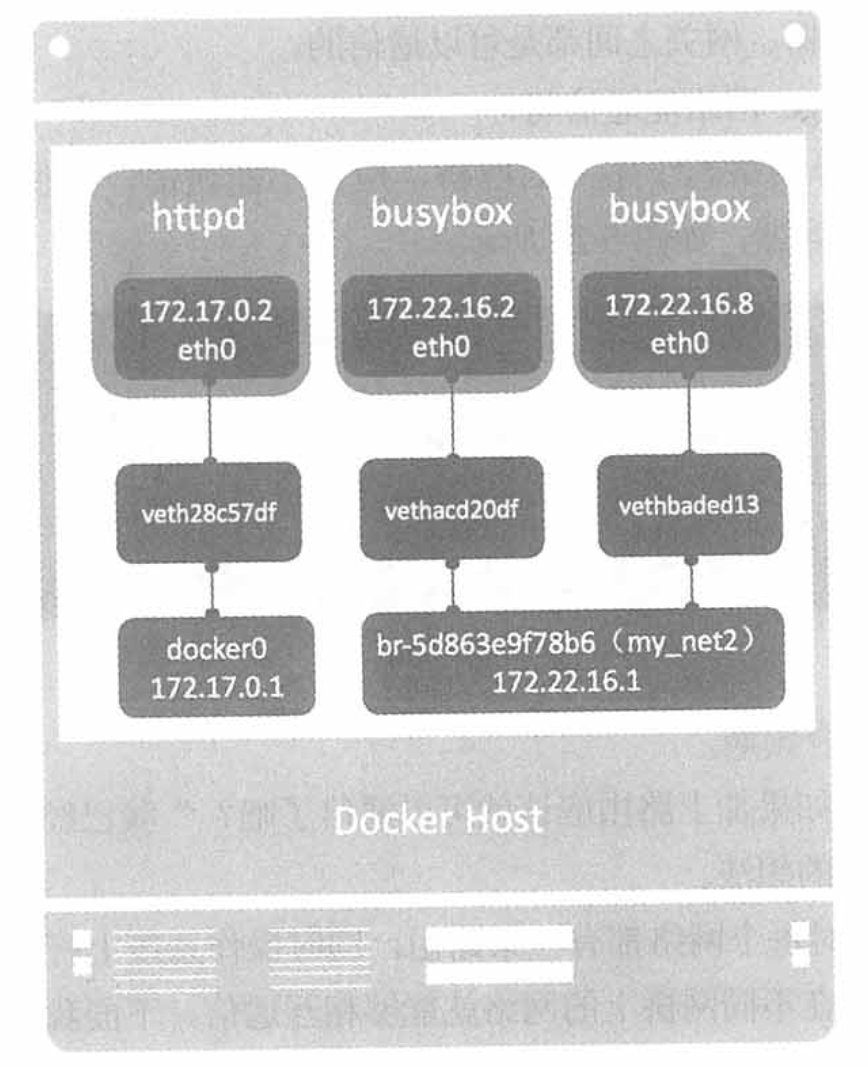
This refers to configuring the docker network according to your own needs. This is more flexible. Docker provides three user-defined network drivers: bridge, overlay and macvlan.
Taking the bridge network as an example, if two dockers are under different bridges, it is definitely not possible to communicate with each other; if they belong to the same bridge, it is definitely possible at this time, as shown in the figure below.
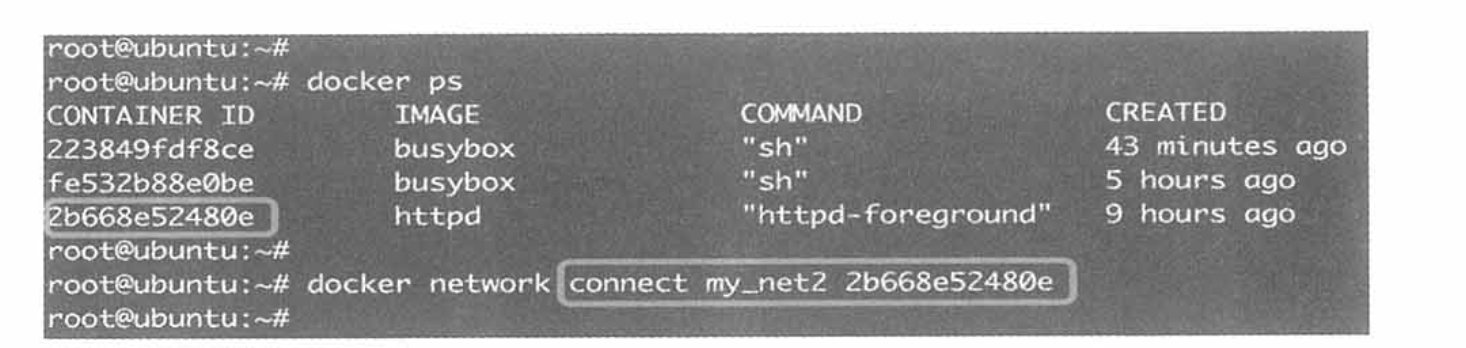
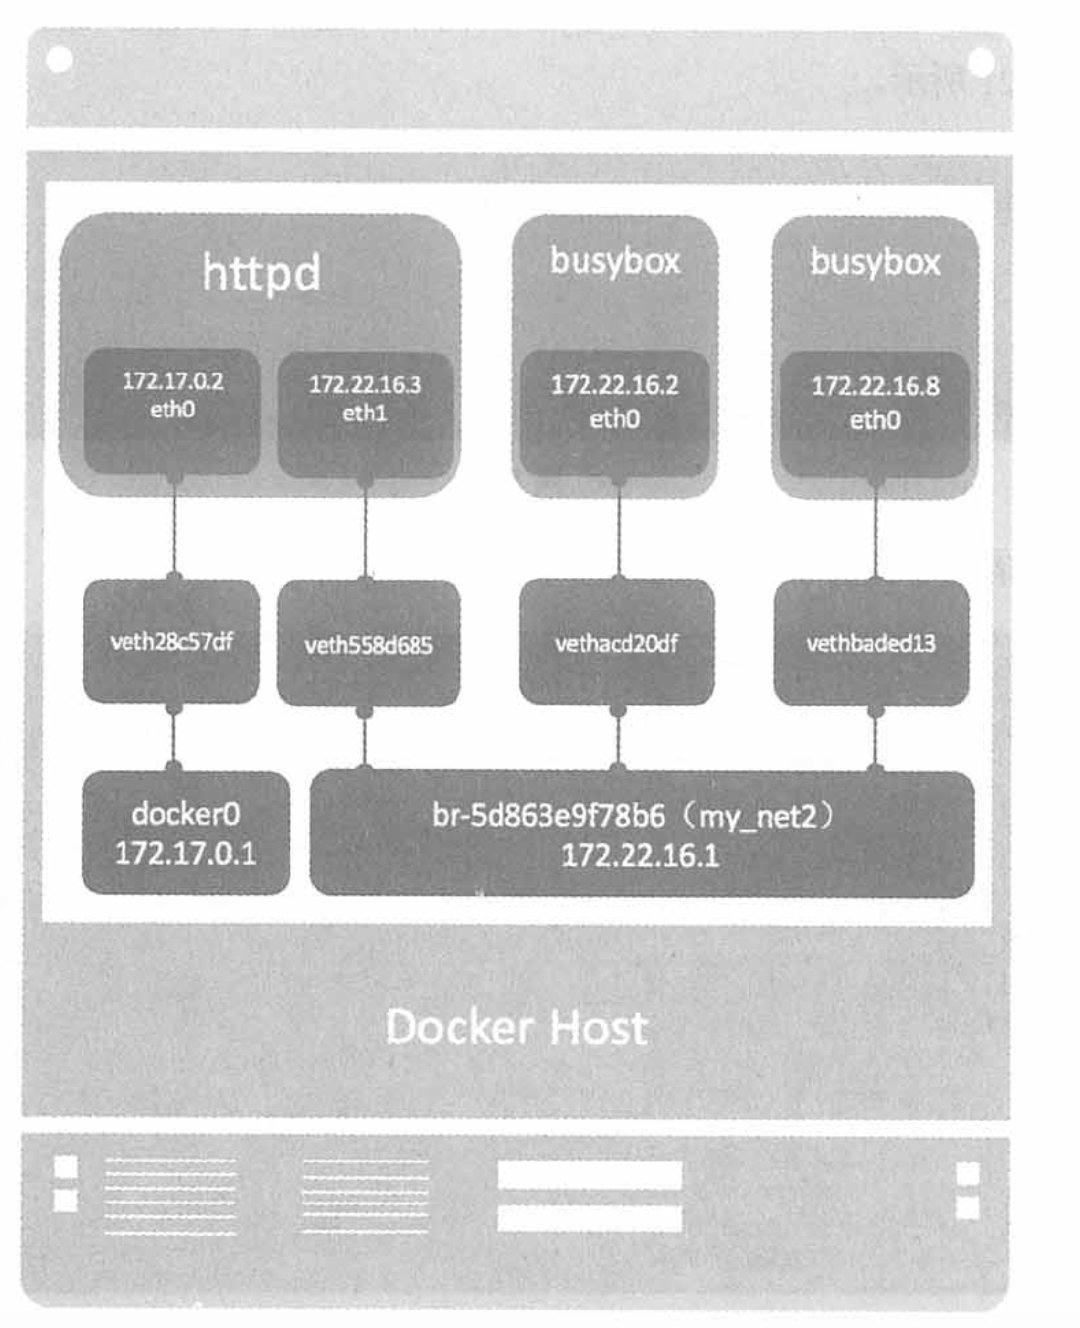
How to make httpd communicate with the busybox bridge, you can add a net_my2 network card under the httpd container, and connect through the following method.
The network model then looks like this:
5. Communication between containers
We know that if two containers are under a bridge, they can communicate with each other. If they are not under a bridge, existing containers can be added to the specified grid through docker network connect. But there is a problem. We know that the IP of the container changes dynamically. The container cannot be accessed only by the IP, but by the network name. But this method can only be used in user-defined network, not in the default bridge.

6. joined container
Joined containers are another way to implement container communication. It enables two or more containers to share a network stack, sharing network cards and configuration information.
I use an example to demonstrate.
I first create a httpd container.

Then create a busybox container and add it to the web1 container.
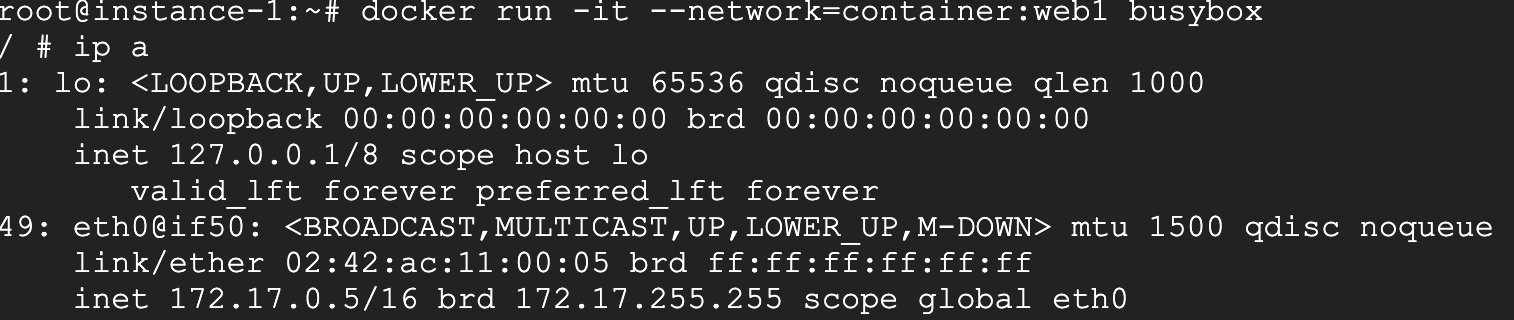
Also look at its network configuration. I compare the network configuration of web1.

Their networks are exactly the same.
Now access the web container directly through 127.0.0.1 in the busybox container, and find that it can be accessed directly, which also proves that the two containers are networked.

7. The container accesses the outside world
We know that the containers we run can directly access the external network.

Look at this, you can directly access it. How is this achieved?

It converts the internal network address into the network address of the host through nat conversion and sends it out. The whole process is shown in the figure below:

This diagram illustrates the whole process very clearly.
8. External network access to Docker container
External network access to the Docker container is achieved through port mapping, that is, after the container is started, the port is mapped to a certain port of the host.
This is to map docker’s port 80 to host’s port 32768, and you can access the container through the host’s ip plus port 32768.
You can also specify the port statically when creating the container.

The whole process can be represented by the figure below.

The whole process is from left to right, forwarded to the container 172.17.0.2 through docker-proxy.